Individual Buttons
With Version 21.50 released mid 2021 you are able to define 2 individual buttons. This chapter is about the configuration for this buttons and some examples on how to use them.
Configuration
Go to [Settings] in your administration area there you can find the direction to the individual buttons configuration.
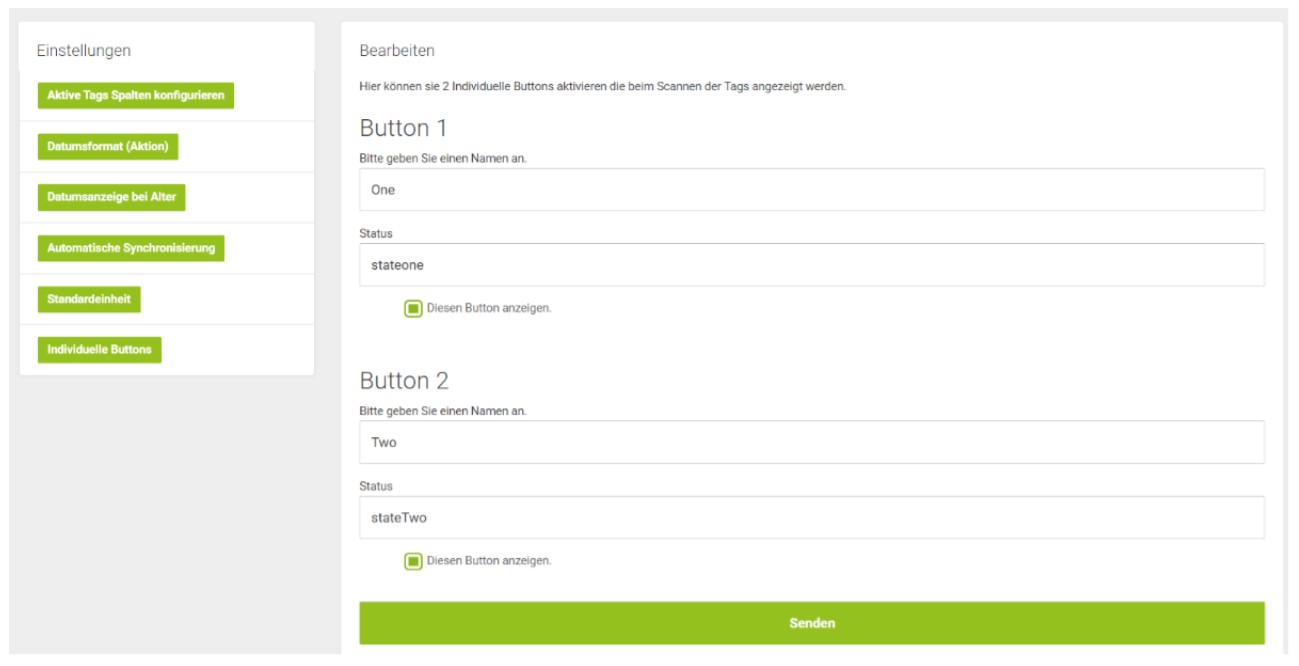
The Buttons are default turned off first time you access the individual buttons menu.
By clicking the checkbox, you can turn button 1 and 2 on. You also can assign a name and the associated status to each.
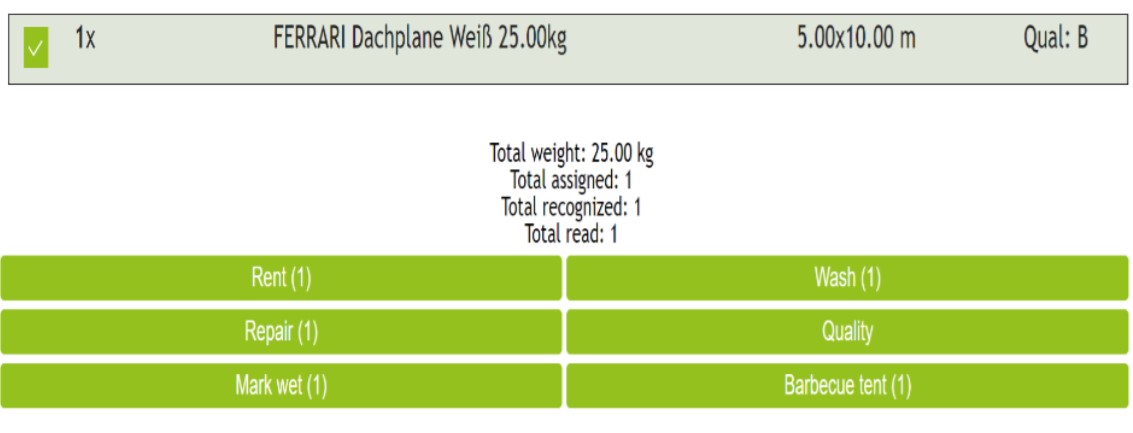
If the button is activated, it will appear in the Scan Area.
Examples
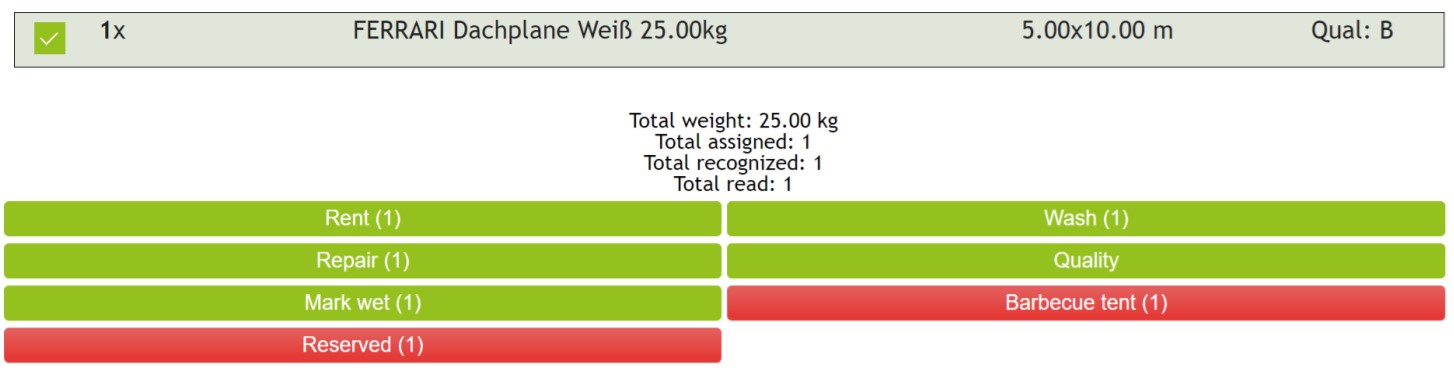
You want to mark covers as part of a barbecue tent.
- Name: barbecue tent.
- State: barbecue tent.
- Scan the cover and press [Barbecue tent].
As the second Example we want to make a reserve Button to mark covers as “reserved” for another order.
- Name: Reserve.
- Status: Reserved.
The State appears as a red button in your scan area. Pressing the Reserved button turns off the state.
The status also appears in you administration area.